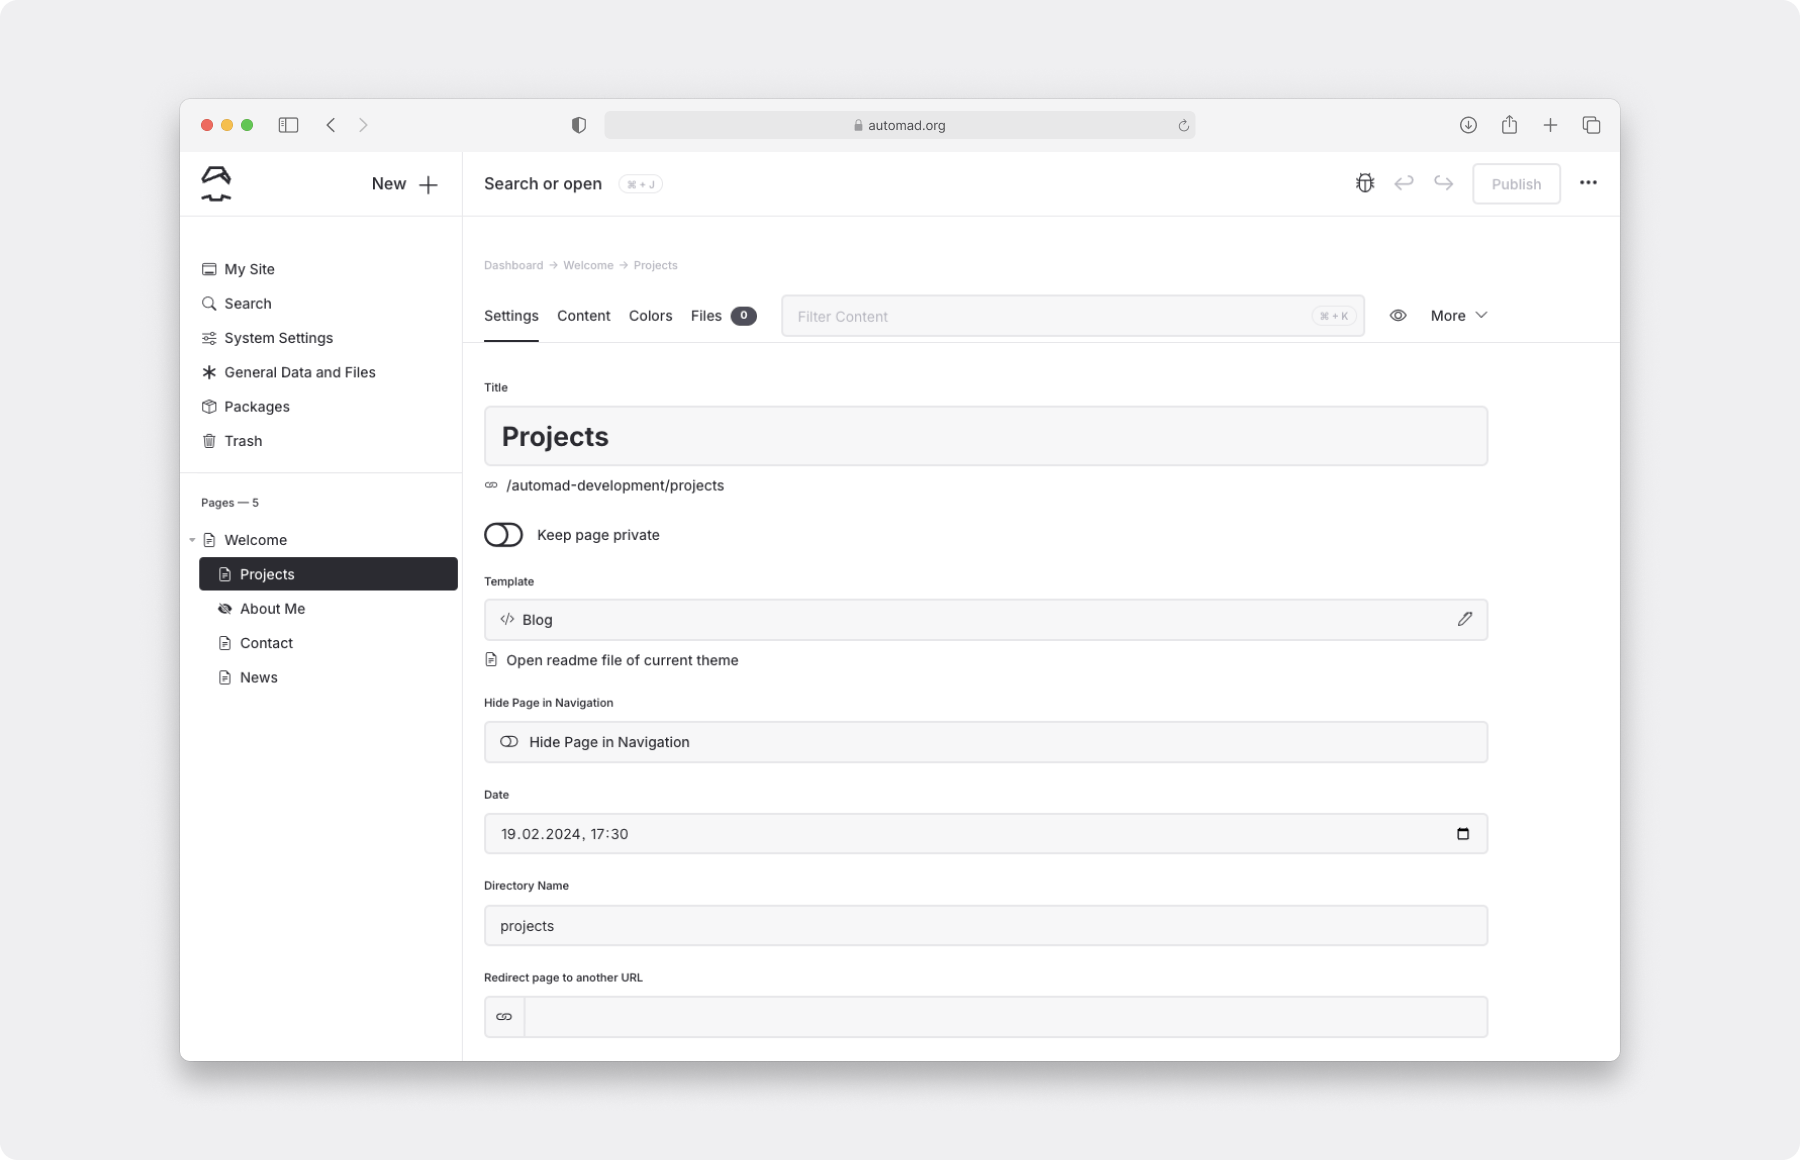
☀ Version 2
It took some time, but the release of Automad 2 is finally getting close. Many things have changed, however, the main concept and goals are still the same — a flexible and fast file-base content management system and templating engine. Read on below to find out more about how to get started and all the new features.

Live Demo
In case you quickly want to try out Automad 2 without setting up a local server, just check out the live demo. This is probably the fastest and easiest way to see what's new in version 2. There is no sign-up required and you can start exploring new features right in away in your personal demo instance. Please note that all demos expire after one hour.
Beta Phase
Note that the development of Automad 2 is currently in beta phase. In fact this phase is needed in order to gather enough user feedback to make Automad better and improve stability. Please keep this in mind when going forward with version 2.
Please be aware that this is a major version upgrade! Aside from being still in beta stage, Automad 2 also introduces some breaking changes. Please take a look at the changelog carefully before migrating a site from version 1!
What's New?
Version 2 is basically a full rewrite — on the backend as well as on the front end. UIkit and jQuery are no longer dependencies and have been replaced by modern web-components. The entire front end is now written in TypeScript. Additionally the following main features are included in version 2:
- A powerful and feature-rich image editor
- Multilingual content support including a language router
- Autosaving in combination with a draft/publish workflow — preview page changes before making them public
- Page revisions let you revert to older versions of a page
- Deleted page can now be restored in the dashboard
- A new page tree with drag'n'drop sorting — no page index needed anymore
- Multiple dashboard themes (light / dark / low contrast)
- Support for SMTP email configuration
Getting Started
The beta version of Automad 2 can be delpoyed using Docker or Composer. It is also possible to simply download and install a distribution bundle manually. Note that the new version will require a modern browser, currently Chrome or Firefox, and a server running Apache or Nginx with PHP 8.2+.
Docker
The quickest way to try out Automad 2 without actually worrying about Nginx and PHP, is using Docker. The v2 tagged image includes everything you need.
docker run -dp 80:80 -v ./app:/app --name mysite automad/automad:v2
This will essentially make your site available at port 80 and mount a directory called app in the current working directory for data persistence. A new user account for the Automad dashboard will be created automatically. The account details will be logged by the running container. You can show these logs using the following command:
docker logs mysite
Composer
Alternatively you can install Automad 2 on your webserver using Composer as follows:
Run the following command to create a fresh project in the current working directory. Note that the directory has to empty:
composer create-project automad/automad . v2.x-devA temporary user account for the Dashboard will be created automatically, which can be changed later.
- Verify the permissions of the installation directory.
- In case you are running an Nginx server, edit the
nginx.confas described here.
Finally log in to http://yoursite.com/dashboard using your temporary account created by Composer.
Manual Installation
In case you are not able to use Docker or Composer, you can also deploy Automad manually.
- Download a distribution bundle and move the unpacked content to the document root of your webserver.
- Make sure the PHP process has the permissions to write to the document root and its subdirectories including all installed files.
- Visit the
/dashboardroute of your site and create the first user.
Migration
Version 2 is a major release and includes breaking changes regarding page content. Please follow the steps below in order to upgrade your old content to be compatible with Automad 2.
- Create a fresh Automad 2 installation next to your current version 1 installation.
Change into the new installation and use the
migratecommand as follows:php automad/console migrate --path /path/to/old/version/siteClear the cache:
php automad/console clearcacheRemove the backups of the
sharedandpagesdirectories that have been created inside your new installation.- Finally make sure that the migrated content is readable and writable by your webserver. Be aware that this is fully dependent on your environment. In most cases the PHP cli should run as the same user that also runs the webserver and no additional action should be required in that case.
The templating engines of version 1 and 2 are fully compatible — themes and extension will continue to work in both versions.
Migration Limitations
The migration process described above will try its best to automatically convert content from a v1 site to a fresh v2 installation. During that process, all pages and files as well as your shared settings and files will be migrated. However, there are some limitations regarding the block editor. Due to the fact that the block editor of version 2 has introduced some breaking changes in terms of formatting block content and handling of images, it will be not possible to convert every detail of your blocks automatically. A manual touch up of blocks will most certainly be required regarding.